The day we moved in, May 5th, we
 |
| Demolition Day 1 |
Demolition Day 2
Demolition Day 3
Demolition Day 4
On Day 4, we made an interesting discovery. Behind the wall of wood panels in the dining room we found a beer... an open beer...an open beer from 1971. Apparently it is true, the guy who chose to put up wood panels had to have been drinking!
Takes Responsibility for the Wood Panels of 1971
Cabinet Layout
The next step was to do some designing and measuring. We actually marked out the cabinets on the floor before we ordered them. We went with Unfinished Shaker Style from Builder's Warehouse. This saved us a lot of money and also allowed us to paint them the exact color we wanted.
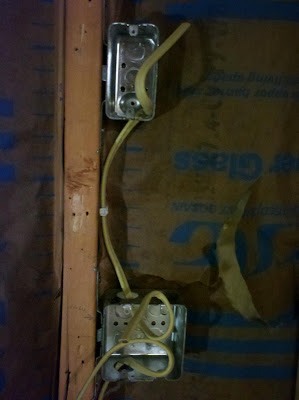
We also had to redo all of the electrical behind the soon-to-be walls, so we ran lots of 'home runs' (I've learned some construction lingo in this process, I plan to be fluent by the end!)
Disclaimer: Don't worry, a real electrician, with real skills, and a real license is doing all of the actual electrical work...we are just pulling wires through holes in the ceiling!
Home runs to Electrical Box
Wires Ready for Outlets
In addition to the electrical, I thought I'd take the time to remove all the rest of the wallpaper from the house, may it rest in peace.
Wallpaper Bouquets
Charlie Supervising the Drywall Process
The next step was to build the walls. We decided to section off a portion of the dining room to use as a new main bathroom, so we built a wall 5 feet into the original dining room. This still allows for a 12X12 dining room and a 10X14 kitchen!
New Dining Room Wall
New Wall
New Wall Completed
The other major component to this project was our goal of removing the wall between the living room and dining room to have one giant, open space leading from the front door, through the living room, dining room, and kitchen. However, after talking to our contractor, we all agreed the wall was just too load-bearing, so we planned a more conservative change. We made the standard doorway into a 6 foot opening, which really opened up the space, but still allowed for a more formal dining room area.
New Doorway to the Dining Room
The pantry/fridge area is another complicated part of this remodel. We knew we wanted the fridge surrounded and we didn't want to lose the existing pantry. So we bumped the pantry wall out two feet, moved a floor-to-ceiling cabinet from the laundry room in to be the new pantry, and created a nook for the fridge.
Fridge & Pantry
Fridge Surround & Pantry Cabinet
The last step in the basic part of the build was to mud and sand the drywall and redo the ceiling plaster.
Finished Walls
Ceiling Now Uniform
Have I mentioned I spent two hours dusting our living room after all the sanding and I still didn't get it all cleaned! I think I'll be dusting for years to come before it is all gone! Charlie, of course, thinks the dust is fun and tries to lay in it as often as possible!Up Next: The Remodel Chronicles, Part 3 (Installation)


